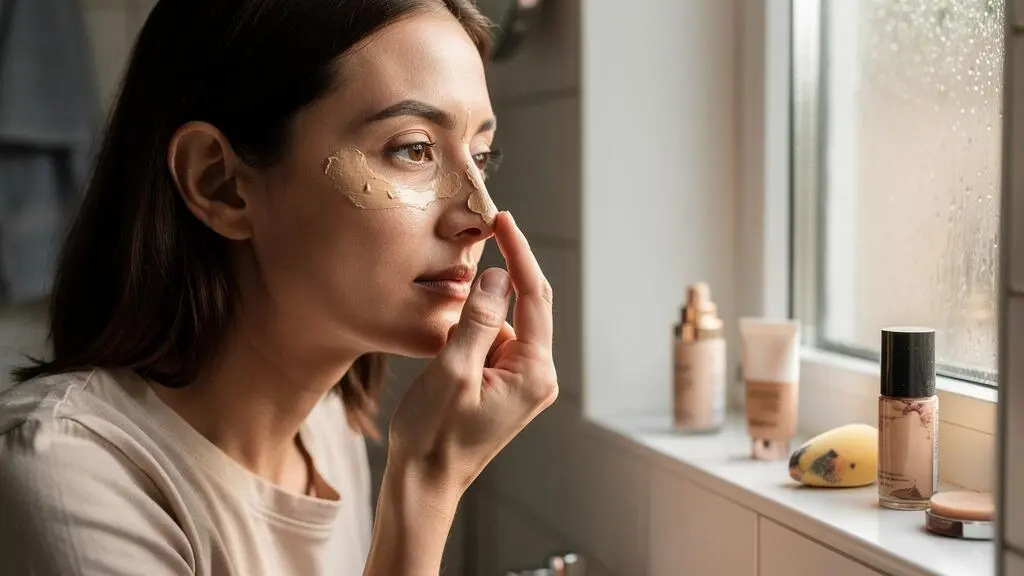
Liquid foundation can look smooth at 8 am and start separating around the nose before lunchtime because the makeup film changes as skin produces oil, facial muscles move and the surface comes into contact with clothing, tissues or hands. The sides of the nose are particularly troublesome when foundation collects around visible pores and creases.
Three hours is not a universal expiry time for foundation. It is a useful checkpoint for discovering whether the problem comes from excessive skincare residue, too much product, an unsuitable finish or a setting technique that works against your skin.
For UK makeup wearers moving between cold outdoor air, warm trains and heated offices, the most reliable approach is to assess foundation under actual wearing conditions rather than selecting it solely by shade, initial coverage or an advertised long-wear claim.
The goal is not necessarily the mattest or thickest foundation. It is a thin, comfortable base that remains reasonably even as your skin changes throughout the day.
Why foundation separates around the nose: the essentials
- Check the skincare underneath. Excess surface residue can interfere with how some foundations spread and settle, particularly on an oily T-zone.
- Apply less product where texture is visible. Thin layers and targeted coverage are generally easier to control than a heavy coat across the nose.
- Judge wear after several hours. Compare finish, oiliness, movement and texture under real commuting and office conditions.
- Why Can Rich Skincare Make Liquid Foundation Split Faster on Combination Skin?
- How to Apply Liquid Foundation in 2 Thin Layers Without Streaks or Texture?
- Dewy or Soft-Matte: Which Liquid Foundation Holds Up Better on the Commute?
- The Powder Choice That Makes Liquid Foundation Look Dry by Mid-Afternoon
- When Should You Test a Liquid Foundation So You Don’t Get Tricked by Shop Lighting?
- Why Can Full Coverage Make Pores Look Bigger Under Daylight?
- Why Does « High-Coverage » Make Texture More Obvious in Real Life?
- Setting Spray or Powder: Which Keeps Makeup Fresher During a Full Office Day?
Why Can Rich Skincare Make Liquid Foundation Split Faster on Combination Skin?
Rich skincare can make liquid foundation separate faster when it leaves a substantial surface film that does not work well with the makeup applied over it. On combination skin, this becomes particularly noticeable around the nose, where natural oil can accumulate alongside moisturiser residue. However, richness alone does not establish incompatibility: the complete formulas and application amounts matter.
Moisturisers contain ingredients serving different purposes. Emollients soften and smooth the skin, humectants help attract and retain moisture, and occlusives form a protective layer that reduces water loss. These functions are explained in DermNet’s explanation of emollients and moisturisers.
That protective layer can be beneficial for dry skin. The complication arises when a particular moisturiser leaves more slip than the foundation can comfortably accommodate. Foundation may then move rather than form an even-looking film, especially after sebum reaches the surface.
Silicone is not automatically the problem. Dimethicone can act as an occlusive ingredient, but its presence does not prove that a moisturiser will cause makeup separation. Many cosmetic formulas use silicones successfully. Texture, concentration, formulation and the amount applied all influence the result.
Combination skin also makes a whole-face skincare routine less predictable. A cream that feels comfortable on dry cheeks may be unnecessarily heavy around the nose and forehead.
To investigate the interaction, try a simple home comparison. Approximately ten minutes after moisturising, gently press a clean tissue against the side of the nose. Notice whether substantial greasy residue transfers. This is an informal observation, not a validated absorption test: some effective moisturisers deliberately leave a surface film.
On another occasion, compare foundation over your usual moisturiser with foundation over a lighter preparation, keeping the product amount and application technique similar. Avoid leaving skin unprotected merely to conduct the comparison; use appropriate moisturiser and sun protection as needed.
A practical adjustment is to use a lighter lotion on the T-zone and reserve richer cream for genuinely dry areas. Before applying foundation, check whether skincare feels comfortably settled rather than excessively slippery. There is no universally established waiting period suitable for every formula.
Once the skincare layer is consistent, application thickness becomes the next variable worth controlling. Even a compatible foundation can look uneven when too much accumulates around the nostrils.
How to Apply Liquid Foundation in 2 Thin Layers Without Streaks or Texture?
Apply liquid foundation in two thin layers by pressing a small quantity onto the skin, allowing the first application to settle, then stippling additional product only where coverage is still needed. This method helps control excess buildup around the nose. It is a practical makeup technique rather than a scientifically established guarantee of longer wear.
The main advantage is distribution. A large application can leave a conspicuous film in nasal creases, around pores and beside the mouth. Applying less at once allows coverage to be placed where it is actually necessary.
Professional makeup artist Jake Bailey recommends building foundation in thin layers and stippling extra coverage selectively in an Allure interview on making foundation last. His advice also emphasises allowing lightweight moisturiser to settle before makeup.
A controlled two-layer application works as follows:
- Prepare the skin. Apply your normal skincare and allow its surface finish to settle. Gently remove obvious excess residue if necessary.
- Place the first layer. Dispense a modest amount of foundation and press it onto the central face with clean fingers, a suitable brush or a slightly damp sponge.
- Blend without overworking. Use short pressing or stippling movements, distributing product outwards and leaving the sides of the nose relatively sheer.
- Allow the film to settle. A minute is a useful starting point, but the foundation’s actual setting behaviour matters more than the clock. Look for reduced wet shine and a slightly settled surface.
- Add selective coverage. Stipple a second small application onto remaining redness or unevenness rather than repeating the first layer across the whole face.
Tool choice also affects the appearance of streaks. As an application starting point, a damp sponge may help distribute a very fluid foundation, while a brush may provide more precise placement for a thicker consistency. These are preferences to test, not universal viscosity rules. Brush density, sponge dampness and how quickly the formula sets can all change the result.
A dense brush dragged repeatedly across a runny foundation may leave visible tracks. Conversely, a dry sponge used with a fast-setting product may produce uneven patches before the formula has been distributed.
The other common error is treating two layers as two immediate coats. If the first remains wet, the second can simply mix into it, increasing thickness without improving control. If the first layer is already fully set, however, repeatedly pressing a second layer may disturb it. Adjust timing to the product rather than following a rigid rule.
Good application cannot entirely compensate for a finish that changes unfavourably as the skin produces oil. The next decision is therefore whether a dewy or soft-matte formula better suits the conditions of your day.
Dewy or Soft-Matte: Which Liquid Foundation Holds Up Better on the Commute?
Soft-matte liquid foundation is often a sensible starting point for an oily T-zone during a warm or crowded commute because it allows some natural sheen to develop without beginning with a glossy finish. Dewy foundation may suit drier areas better, but neither finish guarantees longer wear. The outcome depends on formula, skin behaviour, friction and conditions.
A dewy foundation creates visible radiance from the outset. On combination skin, additional sebum may gradually make the centre of the face appear shinier than intended. A soft-matte foundation begins with less visible sheen, although some formulas can emphasise dryness as the day progresses.
The American Academy of Dermatology advises considering oil-free, water-based makeup and matte-labelled products for oily skin. Its advice on controlling oily skin supports matte products as an option for reducing shine, rather than proving that every matte foundation lasts longer.
Commuting conditions help narrow the choice:
| Wear condition | Likely concern | Practical starting point |
|---|---|---|
| Warm, enclosed train or bus | Shine, perspiration and rubbing | Soft-matte base with minimal product around the nose |
| Outdoor walking in cool weather | Dry patches and friction from scarves | Comfortable natural finish with targeted setting |
| Humid conditions | Surface moisture and increased shine | Test a transfer-resistant soft-matte formula |
| Dry, air-conditioned office | Foundation highlighting dry texture | Natural or satin finish, with selective powder |
| Combination skin with dry cheeks | Different finishes needed across the face | Control shine centrally while keeping cheeks less matte |
These are practical starting points, not results from controlled comparisons between foundation finishes.
A zone-specific finish is often more useful than a whole-face rule. A soft-matte foundation can be paired with a subtle dewy product on dry cheekbones. Alternatively, a more luminous foundation can be kept sheer around the nose and selectively set through the T-zone.
Before buying, compare how each formula looks immediately after application, after your commute and again three to four hours later. Note whether the foundation becomes shiny, separates, gathers in creases or feels uncomfortable.
For a meaningful personal comparison, wear the same foundation under similar skincare conditions on different days, then repeat under a contrasting commute. This helps distinguish a formula that merely looks attractive on application from one that handles your normal environment.
Once the finish suits your routine, powder placement can refine the result. Applying it indiscriminately, however, may create the dry, textured appearance you were trying to prevent.
The Powder Choice That Makes Liquid Foundation Look Dry by Mid-Afternoon
A heavily mattifying powder applied across the entire face can make liquid foundation appear dry by mid-afternoon, particularly when the cheeks are already dehydrated or flaky. The nose may still become oily while powdered areas look textured or creased. Using a small amount of powder selectively is often more appropriate for combination skin than setting every area equally.
Powder is useful because certain particles can absorb surface oil and reduce visible shine. However, adding powder also changes the appearance and feel of the makeup layer. Too much can make dryness more noticeable, particularly when it accumulates over foundation.
Different formats deserve separate consideration:
| Powder format | Useful characteristic | Potential drawback |
|---|---|---|
| Loose translucent powder | Can provide a light, targeted setting layer | Overapplication may make texture more noticeable |
| Pressed powder | Convenient for controlled application or touch-ups | Repeated layers can create visible buildup |
| Strongly mattifying powder | May help reduce shine on oily areas | Can look excessively dry elsewhere |
| Light-reflecting finishing powder | May soften the appearance of the finish in some lighting | Some particles can emphasise texture or create unwanted shine |
The finish depends on each product’s actual formulation, not simply whether it is loose or pressed.
For a combination complexion, let foundation settle before applying powder. Use a small puff or brush to press a modest quantity along the sides of the nose, across the nostril area and wherever the forehead becomes shiny. Keep dry cheeks largely powder-free unless they genuinely need setting.
Pressing is preferable to repeated sweeping when the underlying foundation is vulnerable to being moved. The objective is to place a small amount of powder without disturbing the base.
Timing matters as much as quantity. Powder pressed into visibly wet foundation can combine with the surface makeup and create clumps or uneven areas. Waiting for the foundation to settle usually makes application easier to control.
Midday touch-ups require particular care. If the foundation has already separated, adding powder does not reconstruct the original film. It may simply make the broken patches more obvious. Similarly, colour changes seen during wear should not automatically be attributed to oxidation: oil, lighting and added layers can also affect the apparent shade.
Start by gently removing excess oil with blotting paper. Add a trace of powder only if the remaining surface is reasonably even and still needs shine control.
Even a carefully set foundation may look different under another light source. Testing in realistic daylight is essential before deciding whether a formula genuinely flatters your skin.
When Should You Test a Liquid Foundation So You Don’t Get Tricked by Shop Lighting?
Test liquid foundation in natural daylight immediately after application and again after approximately three to four hours of normal wear. Shop lighting can distort perceived shade, finish and skin texture, while a fresh swatch cannot show how foundation responds to oil and movement. A realistic wear test is more informative than judging the product at the makeup counter alone.
Cosmetics shops often combine warm ambient lighting, bright directional lamps and reflective displays. These conditions can influence how colour and surface texture appear. A foundation that seems seamless in a softly illuminated mirror may look more visible beside a window.
Lighting does not necessarily hide every imperfection. Strong directional light can also exaggerate pores and surface irregularities. The practical issue is that a single retail lighting environment rarely represents all the conditions in which foundation will be worn.
Apply a swatch along the jawline rather than relying on the hand or wrist. The jaw helps reveal how the colour relates to the face and neck. Check it in daylight where possible, without relying solely on a phone camera’s automatic colour processing.
Then evaluate the product after leaving the shop. Pay attention to the sides of the nose, where separation, movement and accumulated product may become easier to see.
The three-to-four-hour assessment is a practical testing interval, not a scientifically established threshold at which foundation must begin breaking down. It is useful because it allows time for everyday oil production, movement and contact to influence the finish.
Test on skin prepared as you normally wear it. A counter demonstration over unfamiliar skincare, or a swatch applied to completely unprepared skin, may behave differently from the same foundation over your regular routine.
Your five-step foundation wear-test checklist
- Record your preparation. Note the moisturiser, primer, SPF and approximate amount used, producing a simple preparation record.
- Check shade in daylight. Apply a jawline swatch and note whether the face-to-neck colour match remains acceptable.
- Photograph the fresh finish. Take a consistent daylight reference photograph, keeping lighting and camera settings as similar as possible.
- Inspect after three to four hours. Record shine, separation, texture, comfort and visible transfer, especially around the nose.
- Compare on another day. Change only one meaningful variable, such as finish or preparation, and write down which combination looked more even.
Photographs can help reveal differences, but automatic exposure, skin smoothing and white balance may alter the result. Use them alongside direct visual assessment rather than treating them as objective measurements.
If the colour remains convincing but pores become more obvious, coverage thickness and formula texture may be more relevant than the shade itself.
Why Can Full Coverage Make Pores Look Bigger Under Daylight?
Full-coverage foundation can make pores appear larger when a visible layer of makeup gathers around pore openings or emphasises the surrounding skin texture. Directional daylight can make these irregularities more noticeable. The effect is not inevitable, and pigment concentration alone does not determine it: application thickness, film formation and how the formula wears are also important.
Foundation cannot physically erase pores. Instead, it changes how the skin surface reflects and absorbs light. A smooth-looking cosmetic film may reduce the visual contrast of uneven pigmentation, but product collecting around pore openings can make those areas stand out.
A scientific observation supports the importance of wear-related movement. In a study published in the Journal of the American Academy of Dermatology, researchers observed foundation on 12 women with different skin types over eight hours. Using magnified imaging, they identified gradual degradation of the cosmetic film and pigment accumulation in follicular openings.
The original study on facial foundation degradation and migration provides evidence that foundation can change after application. It does not establish that every full-coverage product enlarges the appearance of pores, nor that contemporary high-coverage foundations necessarily perform worse than sheer formulas.
8 hours
The observation period in a 2001 study involving 12 female participants. Researchers documented changes in the foundation film and pigment accumulation in follicular openings under controlled conditions; the findings are not a universal wear-time prediction.
Journal of the American Academy of Dermatology, Draelos, 2001.
For visible pores around the nose, the main practical adjustment is to reduce excess product. A sheer layer can even out colour, while a small amount of concealer can address remaining redness or pigmentation without covering every pore with additional foundation.
Compare this with applying a heavy second coat across the whole nose. The latter approach may produce greater opacity initially, but it also introduces more material into areas where movement and settling are already concerns.
Check the result beside a window with light falling at an angle. This can reveal raised product or pore settling that diffuse bathroom lighting makes less obvious. A phone flash may provide another perspective, although it can exaggerate texture and should not be used as the sole standard.
Coverage and a smooth-looking surface are separate qualities. The best result for visible pores may involve substantial pigment in a very small amount of product rather than a thick layer of an otherwise lightweight foundation.
That distinction also helps explain why the phrase “high coverage” on packaging provides relatively little information about how foundation will move throughout a normal working day.
Why Does « High-Coverage » Make Texture More Obvious in Real Life?
High-coverage foundation can make texture more obvious when the applied film is thick, gathers in creases or becomes uneven as the face moves. Coverage describes how effectively a formula conceals underlying colour, not how smooth or flexible its finish will remain. Some high-coverage foundations apply thinly and wear well, while others make surface irregularities more conspicuous.
The distinction matters because two foundations offering similar opacity may feel and behave differently. Pigments, binders, film-forming ingredients and application technique all influence the finished layer. A high-coverage claim alone cannot establish whether a formula will crack, transfer or settle into pores.
Likewise, a greater pigment load does not automatically mean the film is less flexible. That would be an unsupported generalisation about the formulation. What matters in practice is the behaviour of the complete product once it has settled on the skin.
Movement adds another challenge. Smiling, talking, wiping the nose and making contact with a mask or scarf can disturb foundation. A thick application around mobile facial areas may develop more conspicuous lines or patches than a carefully placed, thinner layer.
Rather than choosing one coverage level for the entire face, try a placement-based approach:
- Nose and nostril creases: use minimal foundation and build only where redness remains visible.
- Around the mouth: avoid unnecessary buildup in areas that crease during expression.
- Cheeks: apply extra coverage where pigmentation or uneven colour requires it, while watching for dry patches.
- Individual blemishes: use targeted concealer instead of increasing foundation across otherwise even skin.
This is a practical way to separate the need for opacity from the need for a flexible, natural-looking base. It does not require switching automatically to low-coverage makeup.
Marketing images and freshly applied swatches may emphasise immediate pigmentation rather than realistic wear. To assess a high-coverage product, compare it in daylight, examine how it settles after several hours and check areas affected by facial movement.
A small amount on the back of the hand can demonstrate how a formula spreads and flexes when the hand moves, but hand skin is not a reliable substitute for a facial wear test. Evaluate the final result on the face before making a purchase decision.
The three-hour checkpoint is particularly helpful because the issue may be product migration rather than insufficient initial coverage. Adding more pigment to a layer that is already moving is unlikely to solve the underlying application problem.
Once coverage is distributed sensibly, the remaining question is how to set the base without adding the excess product that makes texture so visible.
What to remember before choosing your setting method
- A foundation that becomes shiny but remains even needs a different correction from one that visibly cracks or separates.
- Controlling oil locally can preserve a more comfortable finish on drier areas.
- Midday maintenance should remove or minimise buildup rather than automatically add another cosmetic layer.
Setting Spray or Powder: Which Keeps Makeup Fresher During a Full Office Day?
Powder is generally the more targeted choice for reducing shine on an oily T-zone, while a suitable setting spray may help with finish, transfer or makeup flexibility without adding powder texture. Neither category guarantees longer-lasting foundation. For combination skin, selective powder followed by a compatible fine-mist spray can be useful, provided the combination does not disturb the base.
Powders and sprays perform different functions depending on their ingredients. Absorbent powders can reduce visible oil, while some setting sprays contain film-forming ingredients intended to improve makeup resistance or transfer behaviour. Other sprays primarily alter the appearance or feel of the finish and may offer little additional holding power.
That distinction makes product selection more important than the category name.
| Skin or wear condition | Practical setting strategy | What to monitor |
|---|---|---|
| Oily nose and relatively dry cheeks | Minimal T-zone powder; optional fine-mist spray | Shine, unevenness and cheek dryness |
| Normal or dry skin with transfer concerns | Consider a transfer-resistant setting spray | Transfer, comfort and formula compatibility |
| Long day involving face coverings or frequent contact | Use a thin base and test targeted setting | Wear at contact points |
| Foundation already separating at lunchtime | Blot first and assess whether local repair is needed | Patchiness and product buildup |
Using both products can make sense if they serve different purposes. After allowing foundation to settle, apply a small amount of powder where oil is most noticeable. Then, if compatible with the foundation, mist setting spray evenly from the distance recommended by its manufacturer and allow it to dry without rubbing.
More setting product is not necessarily better. Multiple heavy powder applications followed by repeated wet layers may produce an uneven or uncomfortable finish. A spray can also visibly disturb makeup if it deposits large droplets or if the formula interacts poorly with the foundation underneath.
For midday maintenance, consider a different sequence. First, inspect whether the foundation is merely shiny or actually broken apart. Gently press blotting paper onto oily areas without rubbing. If the remaining layer is reasonably intact, a small amount of finishing product may be sufficient.
If the base has clearly separated around the nostrils, remove the loose, uneven product locally before attempting a small repair. More powder over broken foundation can intensify the patchiness.
A setting spray may help refresh the appearance of some formulas, but reapplying spray alone will not necessarily restore lost pigment or reconnect a separated film. Similarly, blotting paper removes surface oil; it does not guarantee that the underlying foundation will return to its original appearance.
For UK office wear, evaluate the completed routine at the end of a typical commute and again in late afternoon. Heated transport, indoor conditions and frequent facial contact can reveal different weaknesses. Keep the skincare and foundation consistent when comparing setting products so the results remain interpretable.
For your next foundation purchase, prioritise a comfortable formula that passes a three-to-four-hour wear check over one that only looks flawless on application. Start with the skincare and finish you actually use, apply thin coverage around the nose, and choose powder or spray according to the specific problem observed.
Why does foundation separate on my nose but stay smooth on my cheeks?
The nose and cheeks can differ in surface oil, skincare residue, texture and exposure to rubbing. Foundation may therefore move around the nostrils while remaining comparatively even elsewhere. Check whether the nose receives more product, becomes shinier or comes into contact with tissues and hands during the day.
Can sunscreen underneath foundation cause separation?
Some sunscreen and foundation combinations may not layer comfortably, particularly if one leaves a substantial film or the products are rubbed together during application. Allow sunscreen to form its intended layer according to its directions and test foundation compatibility. Do not reduce or compromise the sunscreen quantity needed for adequate protection simply to improve makeup appearance.
Does foundation separating after three hours mean it is poor quality?
Not necessarily. Separation can reflect the interaction between foundation, skincare, skin oil, application thickness and wearing conditions. Three hours is a useful personal inspection point, not an established universal performance standard. A controlled comparison of preparation and application can help identify whether the formula itself is unsuitable.
Should foundation be removed before fixing a patchy nose?
When the foundation has visibly broken apart, gently removing the loose or uneven product from the affected area may produce a smoother repair than layering more makeup over it. If the base is simply shiny but remains even, blotting excess surface oil may be sufficient without removing the foundation.
Is a long-wear or waterproof foundation automatically better for commuting?
No. Long-wear and water-resistant claims refer to particular intended properties, but they do not establish how a product will interact with your moisturiser, sebum or facial texture. A foundation can resist moisture yet still look heavy around pores or become uneven through friction. A realistic wear test remains the more useful way to judge suitability.